
This presentation is a hands-on introduction to JavaFX, focusing primarily on using the JavaFX Script language to drive interactive graphics using the JavaFX scene graph. I'll start with a "Hello, world" program and build it up piece by piece until we have a complete application. At each step of the way, we'll see the code in NetBeans and run it so you can see the results immediately.
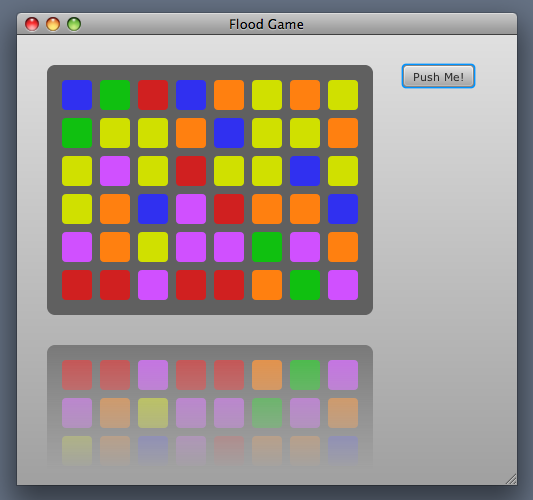
We'll be building a simple "flood fill" game:
The goal is to fill the board with cells of a single color in the minimum number of moves. Each move finds the set of adjacent cells of the same color, starting in the upper-left corner, and changes that set of cells to the color you've chosen. (Adjacent means above, below, left, and right, but not diagonal.) For example, starting from the image shown above, choosing green will change just the yellow cell in the upper left corner to green. For the next move, choosing (say) red will change three cells to red: the upper left cell, and the first and second cells in the second row.
(See here for some analysis about solving this simple game. Note: the program developed in this tutorial does not solve the game; it only enables a human player to play the game.)
This program in this talk is based on JavaFX 1.2.x and NetBeans 6.8. Both are available for download at javafx.com.
We'll start off with the obligatory Hello, World program:
println("Hello, JavaFX!");
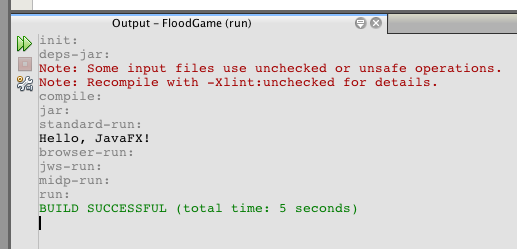
This is just a single line script that prints a string to the standard output. The result shows up in the NetBeans output window, intermixed with Ant output:
Printing text to an output file isn't very interesting. We want to draw stuff on the screen. Try this:
javafx.scene.text.Text {
    x: 20
    y: 20
    content: "Hello, JavaFX!"
}
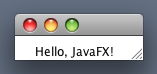
This code creates a node in the scene graph. Nodes can display output and receive mouse and keyboard. As it happens, this is a text node, which draws text. Other kinds of nodes draw shapes, images, complex paths, video, etc.
This code also illustrates the "object literal" syntax, which is an expression that creates objects. It's kind of a like a constructor in Java: it creates a new instance of an object, except with name-value parameters instead of positional parameters. This creates a text node, with values for x and y and content, which is a string.
When a script does nothing more than creating a bare scene graph node, the system automatically wraps a window around it. The result is as follows:
Now let's try something more sophisticated:
import javafx.scene.Scene;
import javafx.scene.shape.Rectangle;
import javafx.stage.Stage;

Stage {
     title: "Flood Game"
     scene: Scene {
         width: 500
         height: 450
         content: Rectangle {
             x: 50
             y: 50
             width: 100
             height: 200
         }
     }
}
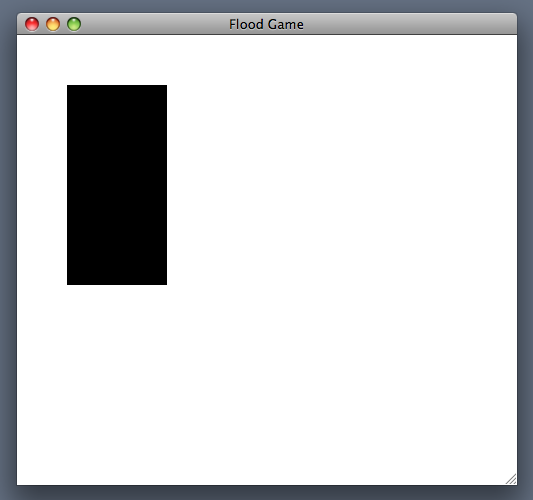
Like Java, objects are described by classes, which live in a packaging hierarchy. JavaFX packages live in the same namespace as Java packages. Here, we're importing some classes from the JavaFX class library. Later, we'll see how to bring in Java classes.
By explicitly creating the Stage and the Scene, we have more control over things like the window's title and the Scene's size by providing parameters in the object literals. Object literals are amenable to deep nesting. So, this creates a Rectangle inside a Scene inside a Stage. The result is as follows:
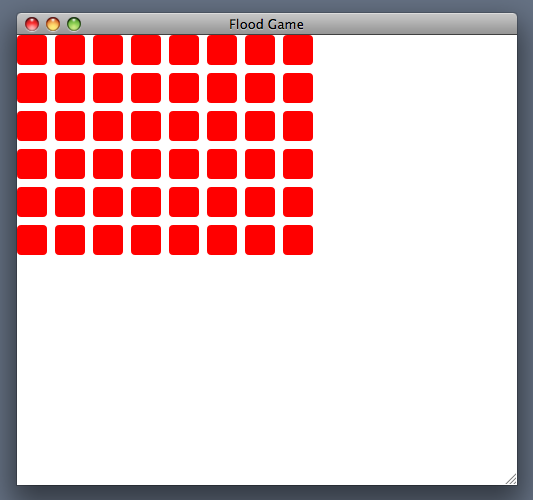
Put this at the top:
import javafx.scene.paint.Color;

def CELLSIZE = 30;
And embed this within the Scene object literal:
    content: Rectangle {
        x: 50
        y: 50
        width: CELLSIZE
        height: CELLSIZE
        fill: Color.RED
    }
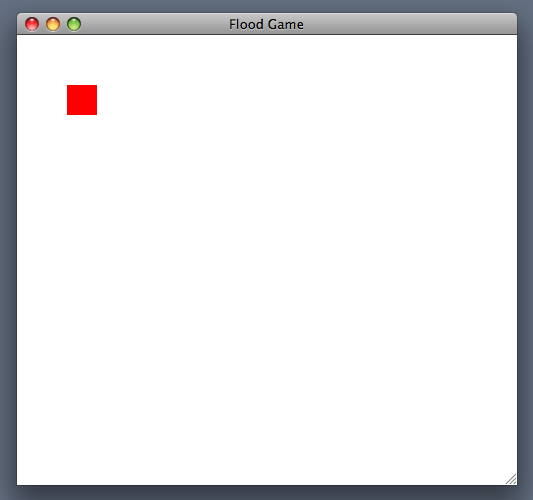
The def declaration is often used for declaring constants. It declares a variable that cannot be assigned (but it's not a constant, because it can be initialized to a bind expression -- more later.) Notice that there is no type declaration. Compiler infers type based on its usage. Since it's initialized, its type is Integer. Other common primitive types are String, Number, Boolean, and Duration.
For the Rectangle, we set its width and height to CELLSIZE and its fill variable (its fill color) to RED, a constant from the Color class, which we had to import.
Some declarations at the top:
def NUMROWS = 6;
def NUMCOLS = 8;
def SPACING = 8;
def ROUNDNESS = 8;
And a replacement for the Scene's content:
    content: [
        for (r in [0..<NUMROWS], c in [0..<NUMCOLS]) {
            Rectangle {
                x: c * (CELLSIZE + SPACING)
                y: r * (CELLSIZE + SPACING)
                width: CELLSIZE
                height: CELLSIZE
                fill: Color.RED
                arcWidth: ROUNDNESS
                arcHeight: ROUNDNESS
            }
        }
    ]
This changes the Scene's contents to be not only a single Rectangle, but a sequence of Rectangles. Sequences are like arrays or lists of objects. A sequence literal can be several objects listed explicitly within square brackets, e.g., [1, 2, 3]. But it can also be the result of the evaluation of a for-loop. The for-loop is executed, and each evaluation of the loop produces a value. The values are collected into a sequence. This sequence is in turn stored into the content sequence of the Scene.
The for-loop itself operates over any sequence of objects, but is commonly over a sequence of integers representing a closed interval [10..20] or as a half-open interval [20..<30].
Note effectively nested for-loops over loop variables r and c.
You may have heard that JavaFX Script, particularly object literals, are "declarative". It can be, though this isn't strictly true. The for-loop is evaluated, can have side effects, etc. Since the loop is inside an object literal, it's evaluated first and the result sequence is passed to the Scene when it's created. Inside-out evaluation. (Like in Java, parameters are evaluated before a method or constructor is called.)
Finally, set arcWidth and arcHeight variables to add roundness to make the rectangles rounded.
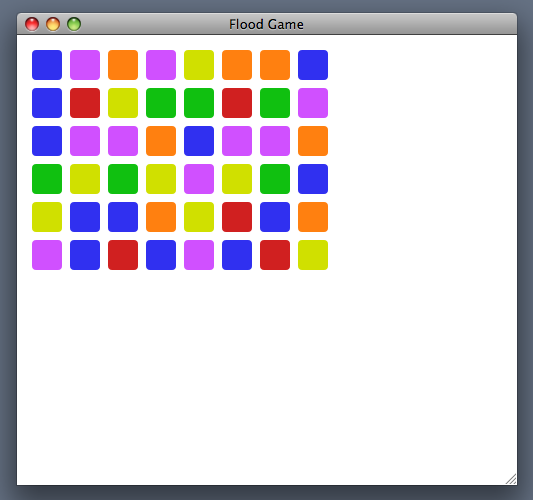
Add the following at the top:
import java.util.Random;

def colors = [
    Color.web("#d02020"),
    Color.web("#ff8010"),
    Color.web("#d0e000"),
    Color.web("#10c010"),
    Color.web("#3030f0"),
    Color.web("#d050ff"),
];

def rand = new Random();

function randColor():Color {
    colors[rand.nextInt(sizeof colors)]
}
Change the Rectangle's fill variable initializer as follows:
    Rectangle {
        ...
        fill: randColor()
        ...
    }
Import the Java class java.util.Random and construct an instance of it, using "new".
Define some colors using #RRGGBB syntax and put these color values into a sequence. Define a function that selects a random color from the color sequence and returns it. Then call this function from within the Rectangle object literal. This makes the rectangles random colors instead of all red.

Move the for-loop out of the Scene object literal and use it to initialize a new variable:
import javafx.scene.*;

var cells = [
    for (r in [0..<NUMROWS], c in [0..<NUMCOLS]) {
        Rectangle {
            x: c * (CELLSIZE + SPACING)
            y: r * (CELLSIZE + SPACING)
            width: CELLSIZE
            height: CELLSIZE
            fill: randColor()
            arcWidth: ROUNDNESS
            arcHeight: ROUNDNESS
        }
    }
];
Now use the cells variable, but put it inside a Group:
    content: [
        Group {
            layoutX: CELLSIZE / 2
            layoutY: CELLSIZE / 2
            content: cells
        }
    ]
The stuff inside the Scene object literal is getting complicated, so let's refactor it out and store it in a variable, and just use this variable in the object literal. This doesn't change the semantics of anything, but it just simplifies the object literal.
Add a new Group node. A Group is an interior node in the scene graph. It can contain other nodes, including other groups. It's not a window: it doesn't have a background, and it doesn't clip its children. It's merely a grouping mechanism for other nodes. Every node within a group is affected by the attributes of that group. In this case we set the layoutX and layoutY variables on the group, and this shifts all of the cells down and to the right.
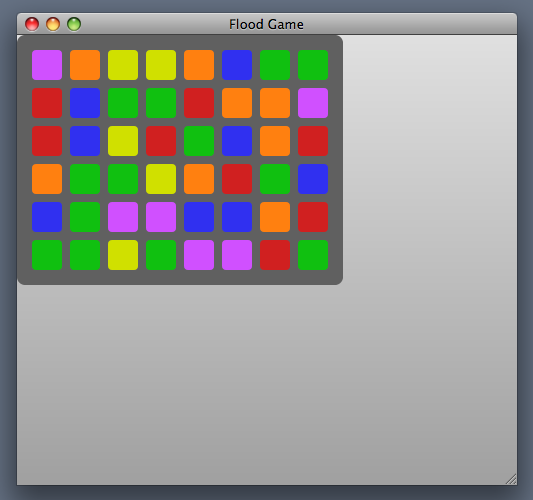
Change the Scene's fill and content as follows:
    fill: LinearGradient {
        startX: 0.0 endX: 0.0 startY: 0.0 endY: 1.0
        stops: [
            Stop { offset: 0.0 color: Color.web("#e0e0e0") }
            Stop { offset: 1.0 color: Color.web("#a0a0a0") }
        ]
    }
    content: [
        Rectangle {
            width: (NUMCOLS+1) * CELLSIZE + (NUMCOLS-1) * SPACING
            height: (NUMROWS+1) * CELLSIZE + (NUMROWS-1) * SPACING
            fill: Color.web("#606060")
            arcWidth: ROUNDNESS * 2
            arcHeight: ROUNDNESS * 2
        }
        Group {
           ...
        }
    ]
A gradient is a smooth transition of color between two or more "stops". The geometry is defined either on a unit square or in absolute pixels. Here we define a gradient on a unit square, running vertically. We define two stops, a light gray and a dark gray, to provide a nice smooth background.
We also add a dark gray rounded rectangle to the scene's content. We add it before the Group that contains the cells. The order of nodes in the content sequence defines the stacking order from bottom to top, so the gray rectangle appears behind the colored cells.
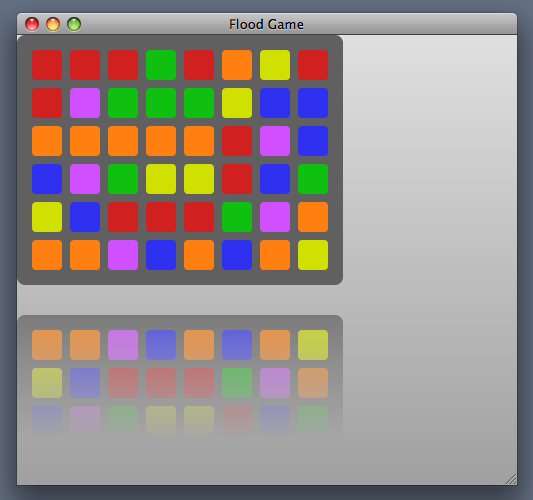
Add this import line:
import javafx.scene.effect.*;
Wrap the background Rectangle and the cells Group within another Group and add an effect:
    Group {
        content: [
            Rectangle { ... }
            Group { ... }
        ]
        effect: Reflection {
            fraction: 0.5
            topOffset: 30
            topOpacity: 0.7
        }
    }
Every node in the scene graph can potentially have an effect applied to it. The effect variable on a node applies to that node. We want to reflect the background rectangle and all the cells, so we have to wrap them all in a group and put the effect on the new group.
JavaFX has a variety of effects built-in, such as blends, blur, glow, color shift, shadows, etc. Here we're using a reflection effect. Most effects have a variety of parameters that alter their behavior. Here, I've chosen some parameters to make the reflection look good.
Add the following import lines:
import javafx.scene.layout.*;
import javafx.scene.control.*;
Wrap the scene's content in an HBox and add a Button:
    HBox {
        spacing: 30
        layoutX: 30
        layoutY: 30
        content: [
            ...
            Button {
                text: "Push Me!"
                action: function() {
                    println("I was pushed.");
                }
            }
        ]
    }
We want to add more stuff on the right. We could position it using absolute coordinates within the scene, but instead we'll use the HBox container. This lays out its contents left-to-right, with the indicated spacing between them. I also set layoutX and layoutY to move the entire HBox away from the upper left corner.
The Button is one of the UI controls library. It provides simple interactivity, by calling an action function when it's pressed. For the action variable of a button, you can name a function that's defined elsewhere, or you can declare an anonymous function inline. I've done the latter. All it does (for now) is print a string to the standard output.
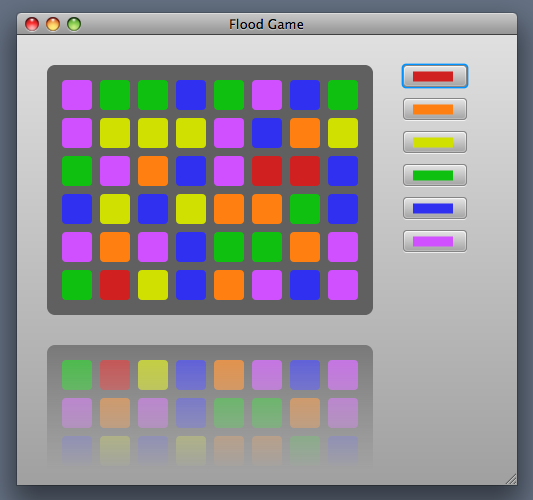
Replace the single Button with a VBox as follows:
    VBox {
        spacing: 10
        content: [
            for (c in colors) {
                Button {
                    graphic: Rectangle {
                        width: 40
                        height: 10
                        fill: c
                    }
                    action: function() {
                        cells[0].fill = c;
                    }
                }
            }
        ]
    }
Functions are lexical closures. Note the use of the 'c' for-loop variable in the action function. Each time through the loop, a Button is created with a Rectangle using a different fill color and a different action function that uses that color, each of which uses the value of c that it had at the time.
class Cell extends Rectangle {
    public-init var row:Integer;
    public-init var col:Integer;
}

var cells = [
    for (r in [0..<NUMROWS], c in [0..<NUMCOLS]) {
        Cell {
            row: r
            col: c
            x: c * (CELLSIZE + SPACING)
            y: r * (CELLSIZE + SPACING)
            width: CELLSIZE
            height: CELLSIZE
            fill: randColor()
            arcWidth: ROUNDNESS
            arcHeight: ROUNDNESS
        }
    }
];

function cellAt(r:Integer, c:Integer):Cell {
    if (r < 0 or c < 0 or r >= NUMROWS or c >= NUMCOLS) {
        null
    } else {
        cells[r * NUMCOLS + c]
    }
}
This step is primarily setup in preparation for features we'll add later.
Basically we declare a Cell class that extends Rectangle. Since Cell "is-a" Rectangle we can use a Cell wherever we had used a Rectangle. Cell adds public-init variables "row" and "col". The public-init declaration means that callers can initialize the variable via an object literal but cannot write to the variables later (which they could if the declaration were public). Another new access modifier is public-read, which means anyone can read but only class or script code can write to such a variable. All public-init variables are also public-read.
(Access modifiers aren't really significant here, since all of this code is within a single script, and code within a single script always has full access. Access modifiers become important when we move classes into other script files or into different packages.)
The instantiation within the for-loop is the same as before except that we change the Rectangle to Cell and we add initializers for row and col.
Subclassing scene graph classes is an easy way to couple application data with nodes in the scene graph.
We also add a function cellAt() that takes two integer parameters and indexes into the cells sequence to make it easier to access the right cell by row and column. The function's return value is the value of the last expression in the function body. In this case it's an if-expression. The value of an if-expression is the value of whichever clause gets evaluated depending upon the condition.
Note that if r or c is out of range, null is returned. This is significant and we'll rely on this later.
Put this import line at the top:
import java.util.*;
Add these functions:
function findMatchingCells():Set {
    def set = new HashSet(); // HashSet<Cell>
    flood(0, 0, cellAt(0, 0).fill as Color, set);
    set
}

function flood(r:Integer, c:Integer, color:Color, set:Set):Void {
    var cell = cellAt(r, c);
    if (cell == null)
        return;
    if (set.contains(cell))
        return;
    if (cell.fill == color) {
        set.add(cell);
        flood(r+1, c, color, set);
        flood(r, c+1, color, set);
        flood(r-1, c, color, set);
        flood(r, c-1, color, set);
    }
}
Change the color Buttons' action function to the following:
    Button {
        action: function() {
            for (elt in findMatchingCells()) {
                def cell = elt as Cell;
                cell.fill = c;
            }
        }
    }
We're now introducing use of the Java collection classes Set and HashSet. For the flood algorithm we start off with the cell in the upper left corner (0,0) and find all adjacent cells that have the same color. Each time we find a matching cell we add it to the set and recur.
Note that the for-loop can iterate not only over sequences, but also over the Set. (Probably, anything that is Iterable.) Since JavaFX Script has no generics, the type of the iteration variable "elt" is Object. We therefore have to downcast it to the right type using the "as" clause.
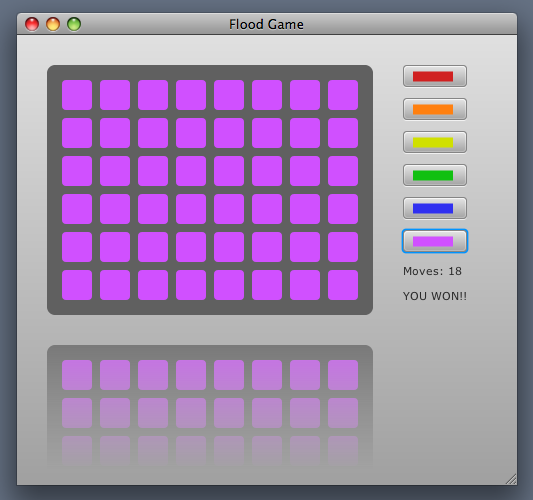
At this point we have a working game.
Add the following declaration:
var numMoves = 0;
In the scene initializer, modify the color Buttons' action function, and add a Label:
    Button {
        action: function() {
            ...
            numMoves++;
        }
    }

    Label {
        text: bind "Moves: {numMoves}"
    }
Now we'll add a counter to keep track of the number of moves. Add a new variable, increment it in each button action, and add a Label that displays the current number of moves.
A Label is a control that displays some textual or graphic output. The text string is formatted using { } construct embedded within the string, which is an expression that's evaluated and converted to a string.
Note the lack of anything that tells the Label to update when the button action changes the value of numMoves. How does this work?
This is what bind is for. Putting bind in an expression says that: anytime a variable that appears in this expression changes, the expression is re-evaluated. Bind can occur in the initializer portion of a variable declaration:
var x = bind y + z;
or in an initializer of an object literal:
Rectangle {
    x: bind centerLine - width/2
    ...
}
If the variable initialized by a bind-expression is on an object in the scene graph, this might end up changing what's on the display. This is a different way to couple nodes in the scene graph with application data. Very common pattern in JavaFX programming: set up nodes in the scene graph that bind to your application data ("model"). Then have things update the model. The scene graph gets updated automatically!
Note that automatic re-evaluation only occurs for changes to variables that occur directly within this expression. If there are function calls in the bind-expression, they aren't automatically re-evaluated when variables they use change. (Except for special cases I'll talk about in a moment.)
Add this new function:
bound function gameWon() {
    def iColor = cells[0].fill;
    def matches = for (c in cells) {
        if (c.fill == iColor)
            c
        else
            null
    }
    sizeof matches == NUMROWS * NUMCOLS
};
Add this new Label to the scene initializer:
    Label {
        text: "YOU WON!!"
        visible: bind gameWon()
    }
As noted above, a typical bind expression doesn't look inside functions in order to do automatic re-evaluation when variables used by that function change value. However, binding does look inside "bound functions".
The price for this greater power is that a bound function has many restrictions on what code can be in it:
Here we want to put another Label into the scene graph but make it visible only when the game has been won. Visibility of a node is controlled by its "visible" variable.
The conventional way to do this would be to check the game-won state, a boolean, after each move, and then set the label's visibility based on the result of the state check. We'll take a somewhat contrived approach in order to illustrate the use of bound functions.
To check the game-won state in a conventional fashion, we'd probably write a function that iterated over the cells until we found one whose color didn't match. At that point we'd return false. If we got to the end of the loop without finding a mismatch, we'd return true. We can't do this in a bound function, though, since the return statement isn't allowed.
To meet the restrictions of coding within a bound function, we have to think a bit unconventionally. First, we define iColor to be the initial color. Then we iterate over all the cells in the sequence, with the for-loop body being an if-expression that results in the cell if it matches, or null if it doesn't match. What good does this do?
Recall that the value of a for-loop is a sequence of values that result from evaluating the body on each iteration. One feature of sequences is that they cannot have nulls; therefore, if the result of one loop evaluation is null, it effectively avoids adding an element to the result sequence. This eventually results in a sequence that contains all the matching cells.
Finally, for the last expression in the bound function, we compare the length of the matching sequence to the total number of cells. If they're equal, we know all the cells match.
(This is a fairly obscure technique. I don't recommend that you program this way.)
At this point we've assembled the full scene graph for the application. Here's a diagram that shows the tree structure of the scene graph (click to enlarge):

And here's a diagram that shows the geometry of the scene graph objects:

After a couple refactorings, we'll start looking at animating the scene graph.
Add the following function:
function recolor(set:Set, color:Color):Void {
    for (elt in set) {
        def cell = elt as Cell;
        cell.fill = color;
    }
}
Change the color Buttons' action to call it:
    Button {
        action: function() {
            recolor(findMatchingCells(), c);
            numMoves++;
        }
    }
This is a simple refactoring step to set up for showing a variety of animations.
Split the function into a variable declaration and another function:
var recolor:function(Set, Color):Void = recolorImmediate;

function recolorImmediate(set:Set, color:Color):Void {
    for (elt in set) {
        def cell = elt as Cell;
        cell.fill = color;
    }
}
This is another refactoring. We want to show several different animation functions. So, we change "recolor" from the name of a function into a variable whose type is a function. Note that we didn't have to change the point where recolor() is called. It's the same whether "recolor" is the name of a function or a function-valued variable.
The old function body is an animation of sorts that updates the cells' colors immediately, so we'll name the new function "recolorImmediate()" and initialize the recolor variable with that function.
Add these declarations at the top:
import javafx.animation.*;

def ANIMTIME = 1s;
Add this new function and update the recolor function variable:
var recolor:function(Set, Color):Void = recolorDirectFade;

function recolorDirectFade(set:Set, color:Color):Void {
    Timeline {
        keyFrames: KeyFrame {
                time: ANIMTIME
                values: [
                    for (elt in set) {
                        def cell = elt as Cell;
                        cell.fill => color
                    }
                ]
            }
    }.playFromStart();
}
Keyframe-based animation basically says: at some point in the future, we want these variables to end up with certain values. Make this happen gradually between now and then, by interpolating between values.
Instead of changing colors instantly, we have the system fade between the start and end color.
Watch a movie that shows all the animations demonstrated in this tutorial. The immediate color change (no animation) is at the start of the movie. The direct fade starts about 8 seconds into the movie.
var recolor:function(Set, Color):Void = recolorFadeThruTransparent;

function recolorFadeThruTransparent(set:Set, color:Color):Void {
    Timeline {
        keyFrames:
            for (elt in set) {
                def cell = elt as Cell;
                [
                    KeyFrame {
                        time: ANIMTIME / 2
                        values: cell.opacity => 0.0
                        action: function() { cell.fill = color }
                    },
                    KeyFrame {
                        time: ANIMTIME
                        values: cell.opacity => 1.0
                    }
                ]
            }
    }.playFromStart();
}
Fading directly isn't always very visible. So let's fade the cell to transparent, switch its color, then fade it back to opaque. Construct a two-step animation by providing a pair of KeyFrames, the first at midway through the animation time and the second at the end. Note that we've had to pull the for-loop around the outside, to make a sequence of KeyFrames, instead of making a sequence of values within a single KeyFrame. This is because we want each midpoint KeyFrame to have a different action function, applying to a different cell.
The fade through transparent animation is shown about 16 seconds into the movie.
function recolorSpin(set:Set, color:Color):Void {
    Timeline {
        keyFrames:
            for (elt in set) {
                def cell = elt as Cell;
                def ix = cell.x;
                def iy = cell.y;
                [
                    KeyFrame {
                        time: ANIMTIME / 2
                        values: [
                                cell.x => ix + CELLSIZE / 2,
                                cell.y => iy + CELLSIZE / 2,
                                cell.width => 0.0,
                                cell.height => 0.0,
                                cell.rotate => 360
                            ]
                        action: function() { cell.fill = color }
                    },
                    KeyFrame {
                        time: ANIMTIME
                        values: [
                                cell.x => ix,
                                cell.y => iy,
                                cell.width => CELLSIZE,
                                cell.height => CELLSIZE,
                                cell.rotate => 0
                            ]
                    }
                ]
            }
    }.playFromStart();
}
Different animation approach: shrink to zero size. Set up (x,y) targeted toward the cell center at the same time width and height are targeted to zero. At the same time, rotate 360 degrees and back. This all happens in the first half of the animation. Then, in the second half, restore all the values to their original values.
Note that animations are visible in the reflection!
The spin-and-shrink animation is shown about 26 seconds into the movie.
function recolorFlip(set:Set, color:Color):Void {
    Timeline {
        keyFrames: [
            for (elt in set) {
                def cell = elt as Cell;
                [
                    KeyFrame {
                        time: ANIMTIME / 2
                        values: cell.scaleX => 0.0
                        action: function() { cell.fill = color }
                    },
                    KeyFrame {
                        time: ANIMTIME
                        values: cell.scaleX => 1.0
                    }
                ]
            }
        ]
    }.playFromStart();
}
Each node has scaleX and scaleY variables. Animate scaleX to zero and back, so it looks like the cell is being flipped. Note that scaling is centered by default, so we don't have to move x and y to keep the cell centered.
The flip animation is shown about 35 seconds into the movie.
function recolorFlip(set:Set, color:Color):Void {
    Timeline {
        keyFrames: [
            for (elt in set) {
                def cell = elt as Cell;
                def delay = (cell.row + cell.col) * 60ms;
                [
                    KeyFrame {
                        time: delay
                        values: cell.scaleX => 1.0
                    }
                    KeyFrame {
                        time: delay + ANIMTIME / 4
                        values: cell.scaleX => 0.0
                        action: function() { cell.fill = color }
                    },
                    KeyFrame {
                        time: delay + ANIMTIME / 2
                        values: cell.scaleX => 1.0
                    }
                ]
            }
        ]
    }.playFromStart();
}
Add a delay to the cells' KeyFrames based on where they are in the grid. (Remember the row and col variables we added much earlier?) This adds a nice cascading effect. Reduce the animation time, otherwise it'll get to slow for cells toward the bottom right of the grid.
The flip-with-delay animation is shown about 44 seconds into the movie.
Here's the JavaFX Script source code containing all the code shown above. As you can see, we've covered a lot of territory.
JavaFX Script language features we've covered include: object literals, declarations, type inference, sequences, for-loops, using Java classes, defining functions, anonymous functions, closures, classes, access modifiers, binding, bound functions, and function variables.
JavaFX scene graph features we've covered include: nodes in the scene graph, stages, scenes, shapes, groups, colors, gradients, effects, layout position, HBox and VBox containers, Button and Label controls, and keyframe animation.
But it's not just a collection of independent features. The features of JavaFX all work together to create an application environment that's productive and fun.
Websites and blogs:
Books: